Installation Guide

Install client, invite bot, assign nets.

Install the client, invite the bot, use the Discord setup commands, then manage channels and assignments from the client Admin panel.

Start with the client

Step 01 — Every operator

Install the client.

Every member who wants to talk needs the client. The standalone Windows MSIX is the recommended Windows path. Alternates below.

Premium shard hosts

Choose how the premium shard is hosted.

Premium starts with Command Net Supporter on Patreon (linked to Discord in the Star Comms Discord). Self Hosted means you run the shard process and keep full control of uptime and routing. Centrally Hosted means Star Comms runs the shard for you with automatic provisioning. Both paths include the full Owner API, URI links, webhooks, and normal shard admin controls.

Full Owner API docs apply to both Self Hosted and Centrally Hosted shards.

After installing, members should open the client, run Check Updates, and link Discord once. They'll see your org as soon as the bot is configured — which is the rest of this guide.

Step 02 — Org leader, once

Invite the Star Comms bot.

The bot handles the one-time setup and role checks. It never joins voice channels — Star Comms voice runs through its own network, not Discord voice.

  1. Click Invite Star Comms and pick your org's Discord server. You need Manage Server permission.
  2. Keep both requested scopes: bot and applications.commands — the second one is what makes /star commands appear.
  3. Create (or pick) a command channel like #star-comms and decide which role is your commander role and which is your admin role. Those roles unlock client-side Admin controls.

Ready? This opens Discord's own authorization screen.

Invite Star Comms Bot + slash commands only. No voice channel access needed.

Step 03 — Org leader, in Discord

Use startup, config, status, then the Admin panel.

Discord setup uses three commands: /star startup, /star config, and /star status. Channel creation, channel removal, live assignment, and operator management happen in the Star Comms client Admin panel.

3.1

/star startup — configure the Discord server

Run this first to open the setup modal. The modal collects the command channel, initial Full Admin role, initial Squad Leader role, and discovery options without forcing a long slash-command argument list.

# star-comms Startup modal
OC
Operation Commander
/star startup opens First-time setup modal asks for command channel, admin role, squad leader role optional org discovery gate
Star Comms APP
Startup complete. Your org is now configured for Star Comms.
3.2

/star config - manage settings

Use /star config whenever you need to add or remove admin roles, change Squad Leader roles, adjust org discovery gates, or review the core server configuration from Discord.

# star-comms Config panel
AD
Server Admin
/star config panel roles, discovery, command settings buttons add, remove, update
Star Comms APP
Configuration panel opened. Use the buttons to manage roles and discovery gates.
3.3

/star status — check premium, users, and nets

/star status shows premium entitlement, operation state, active users, net layout, and the current shape of the Star Comms server.

# star-comms Status panel
SL
Squad Lead
/star status shows premium, active users, net layout useful for pre-op sanity checks
Star Comms APP
Premium active. 12 users online. 8 nets configured. Operation open.
3.4

Client Admin — manage channels and assignments

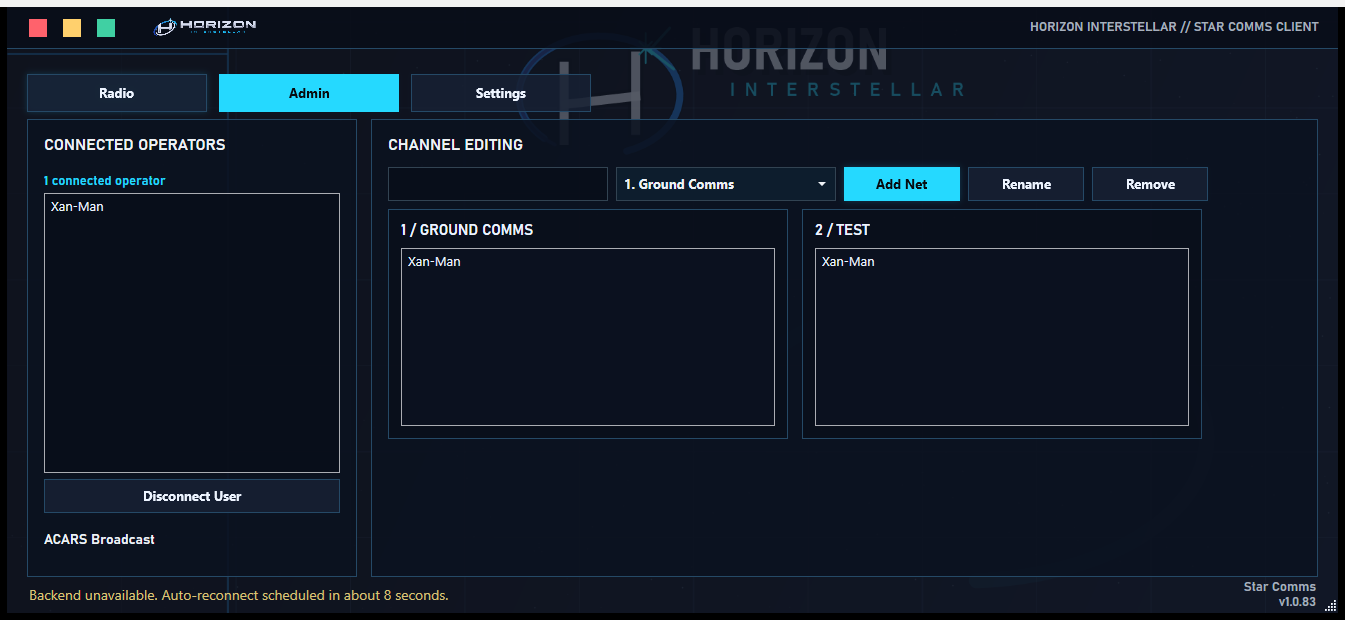
Full Admins and Squad Leaders use the Star Comms client Admin panel for the actual operation work: create nets, rename nets, remove channels, assign users, disconnect stuck clients, and send ACARS alerts.

Star Comms Client Admin panel
AD
Client Admin
Admin panel channels Add, rename, remove members drag, assign, disconnect alerts ACARS broadcast
Star Comms Client ADMIN
Board updated. Connected clients refresh automatically.

Current command reference

/star startup

One-time org setup through a modal. Use it to establish the command channel, initial admin roles, and discovery behavior.

/star config

Opens the configuration panel for roles, discovery gates, and server-level Star Comms settings.

/star status

Shows premium status, active users, net layout, and operation state.

Client Admin panel

Add, rename, remove, assign, disconnect, and send ACARS from the desktop client.

Removed old command flow

Net add/remove, open/close, and role add/remove work moved into panels and the client Admin surface.

Step 04 — Op night

What your crew sees.

Real captures from the actual client. Members link Discord, enter your org, get assigned to nets, then transmit.

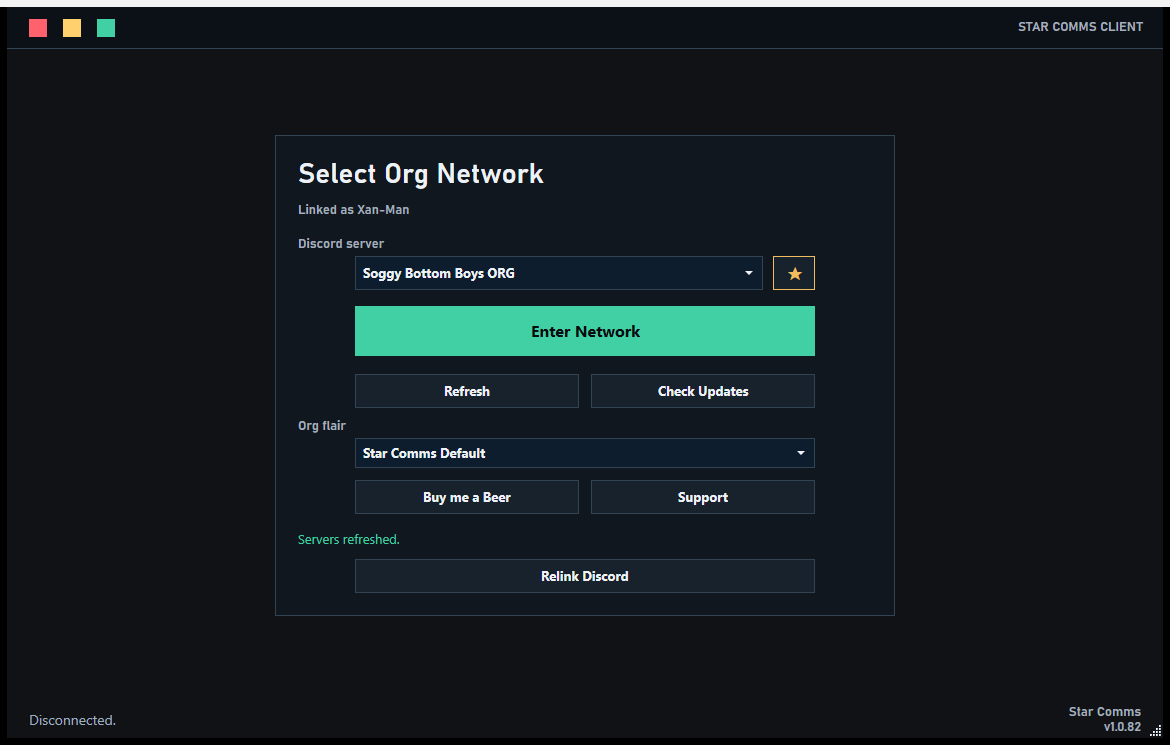
Star Comms launcher with Discord linked and org selected
1. Link & enter Members link Discord once, pick your org, and hit Enter Network. Only orgs running Star Comms appear.
Star Comms admin tab with connected operators and channel boards
2. Get assigned Your admins see everyone in the waiting room and drag them into the right nets for the op.
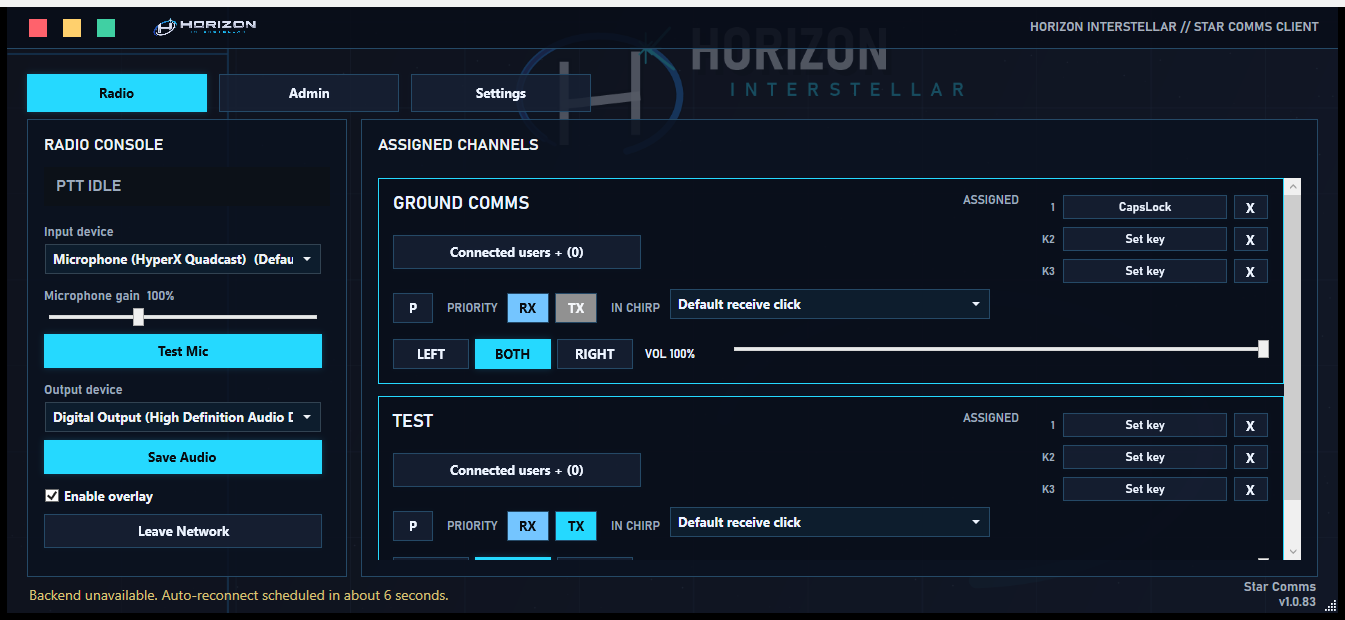
Star Comms radio console with assigned channels and keybinds
3. Key up Each assigned net appears as a channel card — set a push-to-talk key, route the audio, and transmit.

Step 05 — Before the first op

Go-live checklist.